Step 1: Configure your New Blog
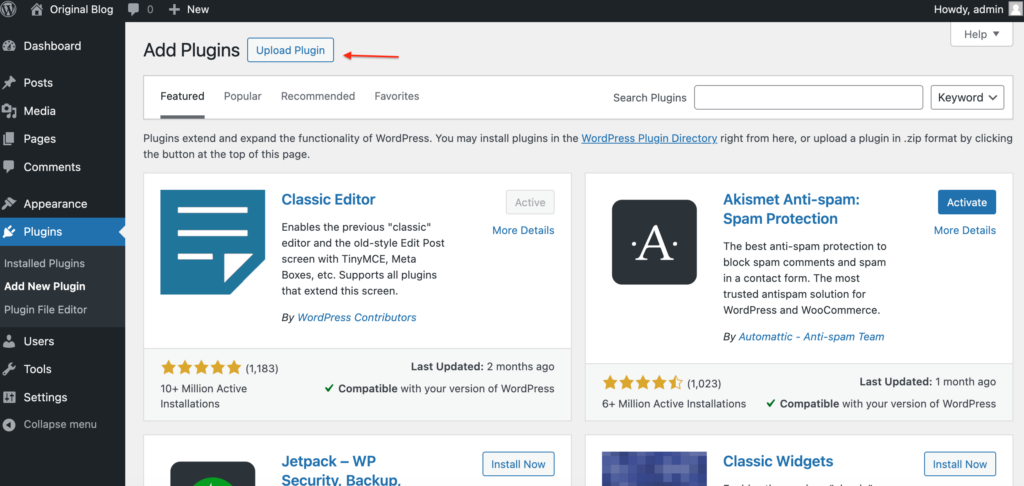
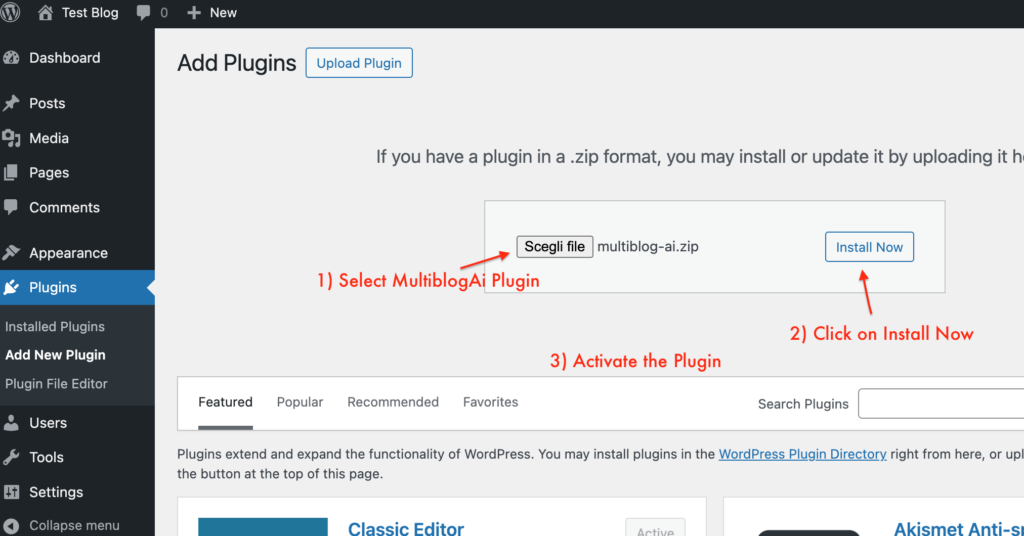
- Download MultiBlog AI Plugin CLICK HERE
- Install the Plugin
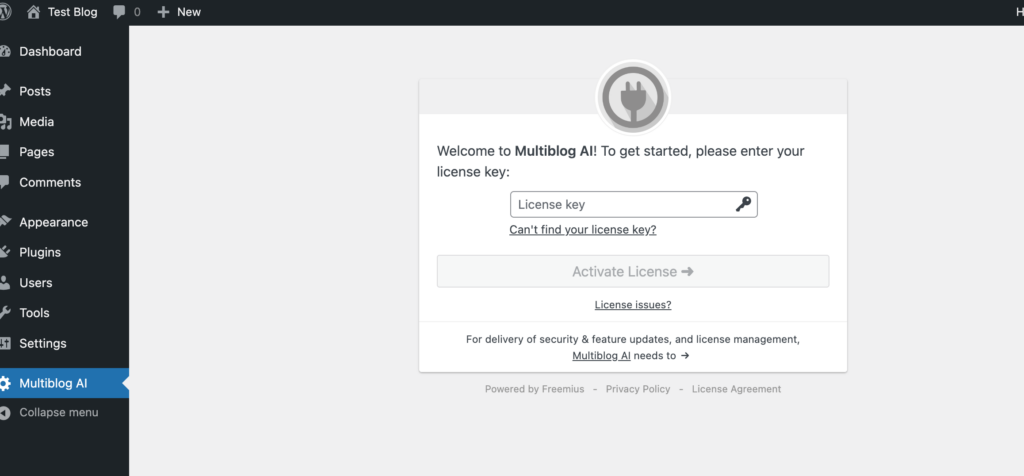
Step 2) Buy and Activate your License
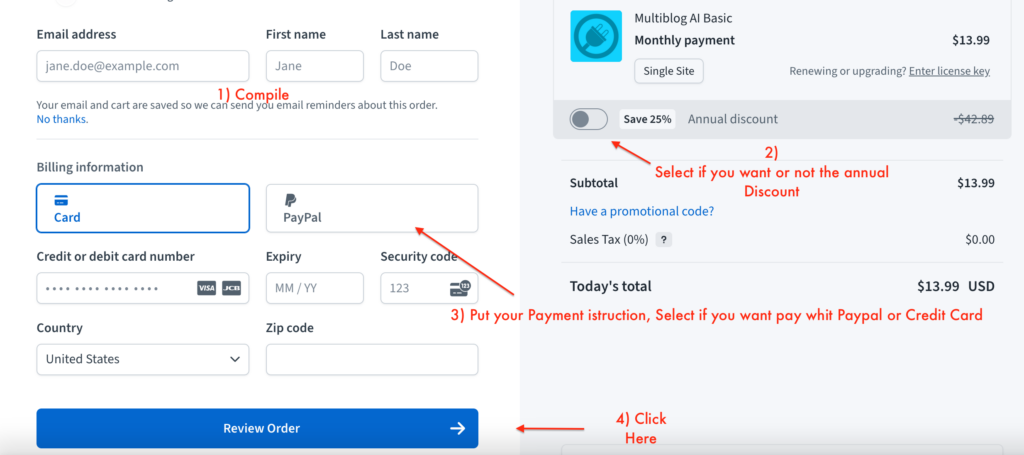
Select your License plan , whit Basic Plan you can use it on you Original Blog and another to translate or rewrite post, on Pro your Original + 3 blogs to translate or rewrite , Elite your Original + 10 Blogs to translate or rewrite
Select you Plan Click Here
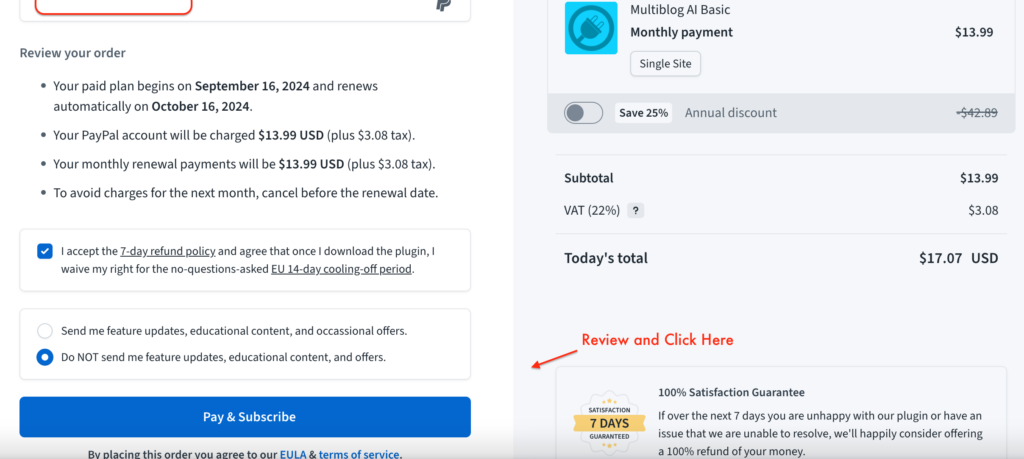
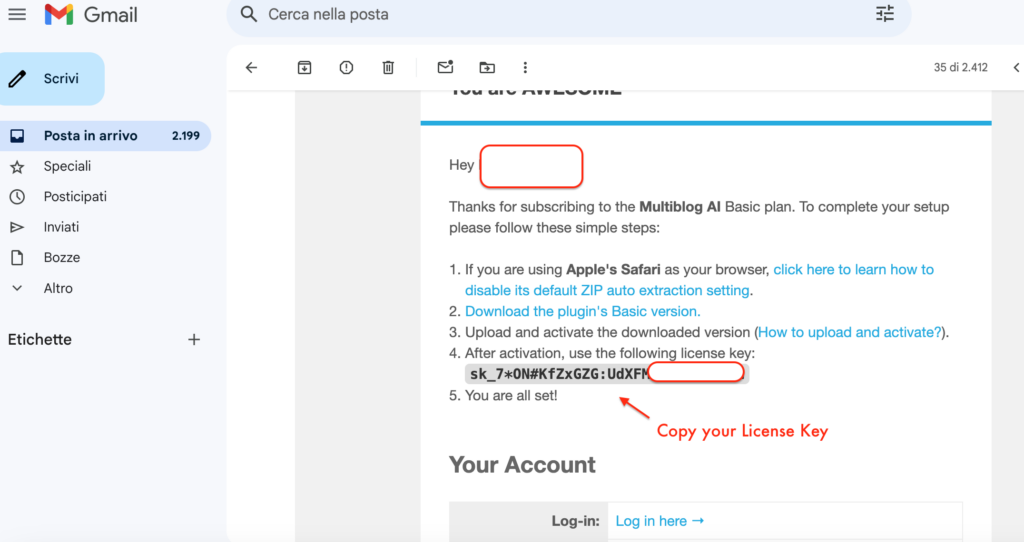
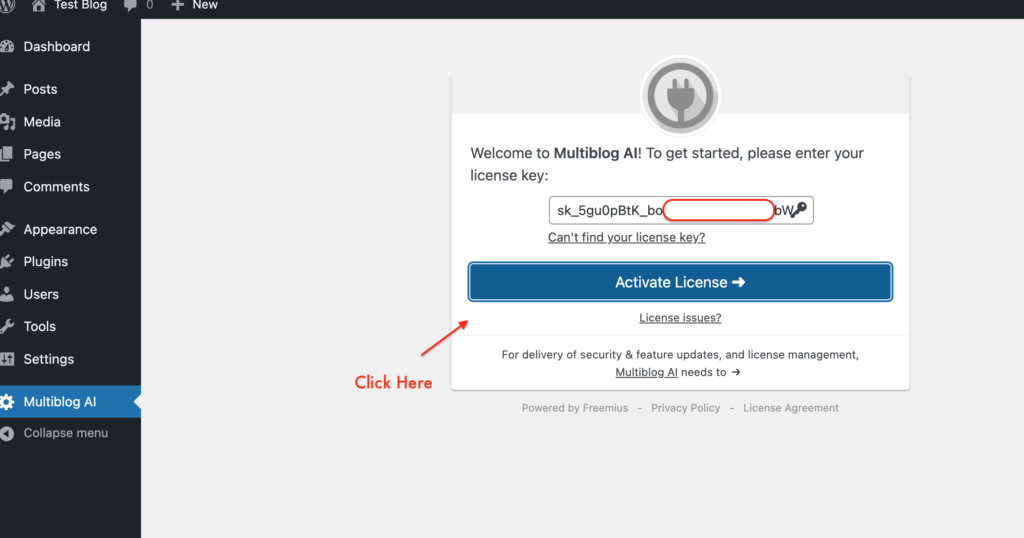
2) After completing your purchase, check the email you entered in the purchase form
Open the email and copy the license code into the activation page on your website
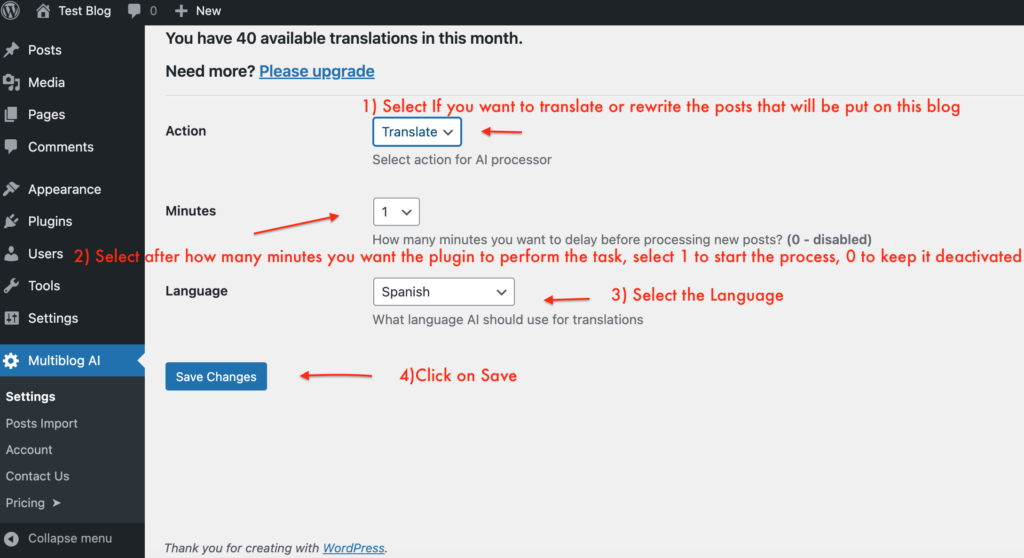
Set the main functions,
1) If you want to translate or rewrite the posts that will be put on this blog
2) Select after how many minutes you want the plugin to perform the task, select 1 to start the process, 0 to keep it deactivated.
If you intend to publish many posts I recommend selecting a longer time frame 5, 10 or 15 minutes so as not to overload
3) If you have selected translate, select which language you want your post to be translated into
Step 3 : Configure your original Blog
- Go to your main blog (We will call it Original) where you normally post in your native language.
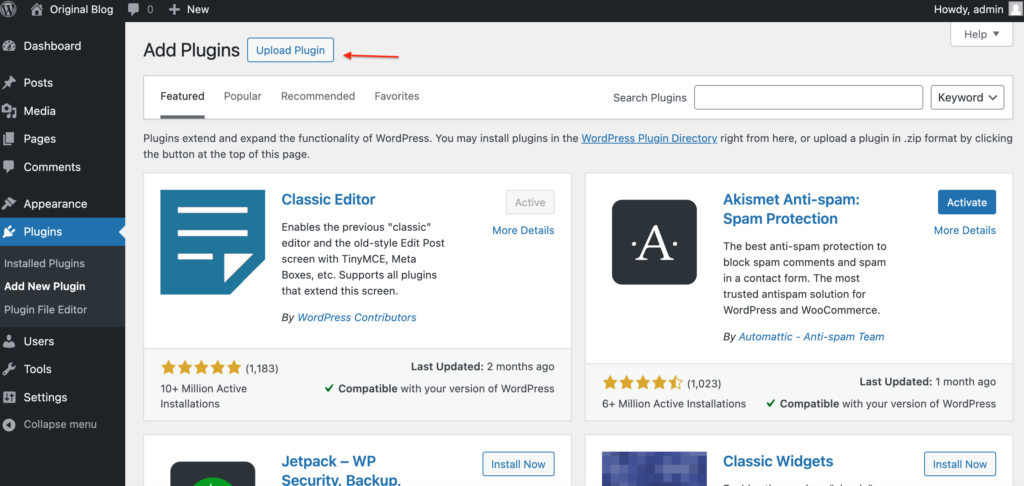
2) Download the WP-Export Plugin CLICK HERE
3) Install the Plugin
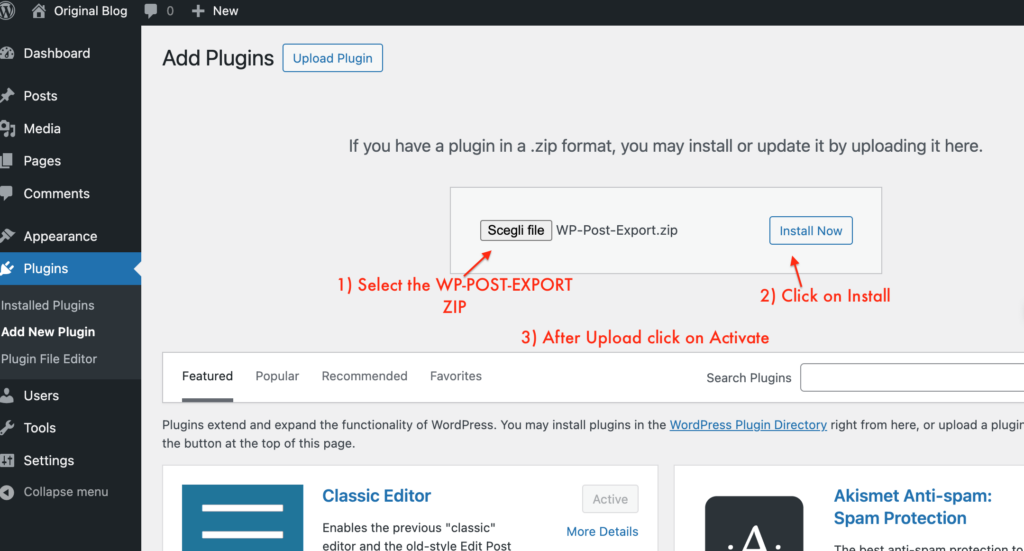
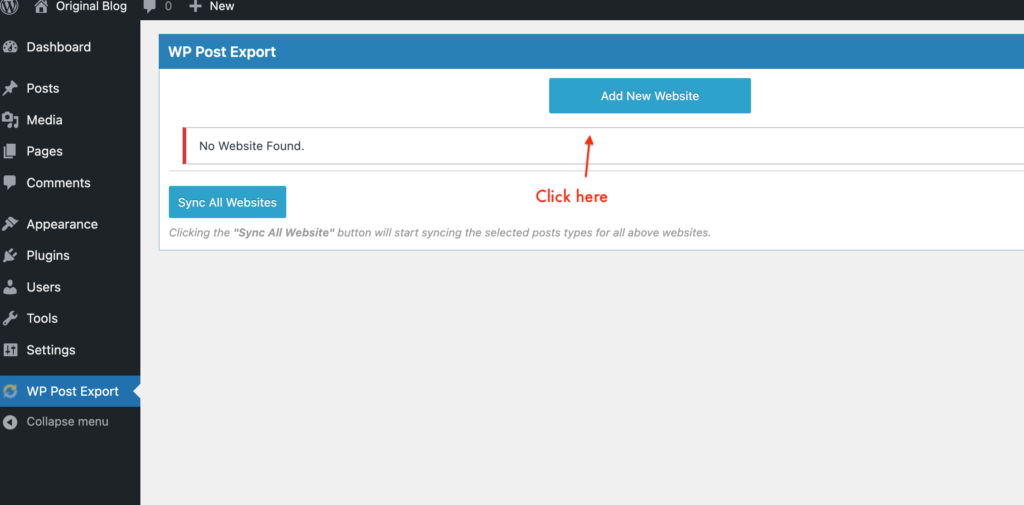
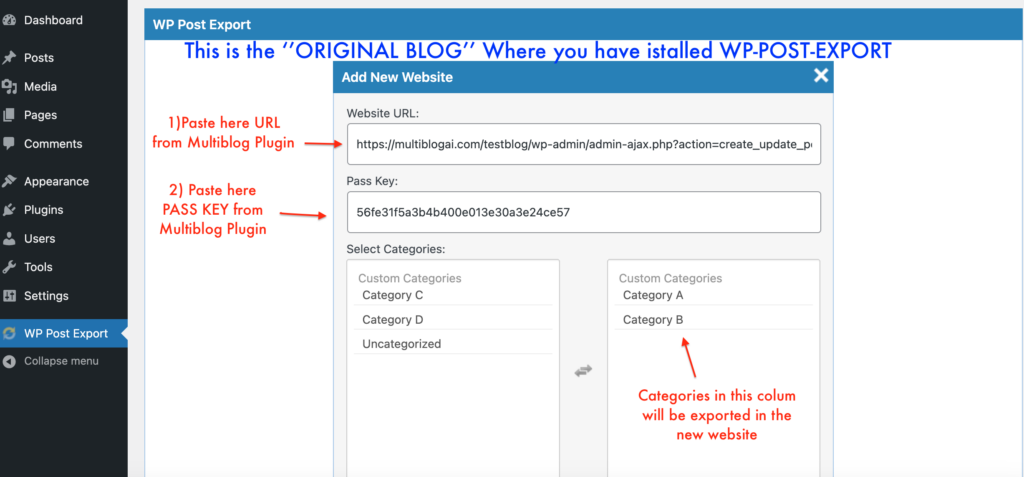
In the wordpress menu bar click on WP-post-export and add website
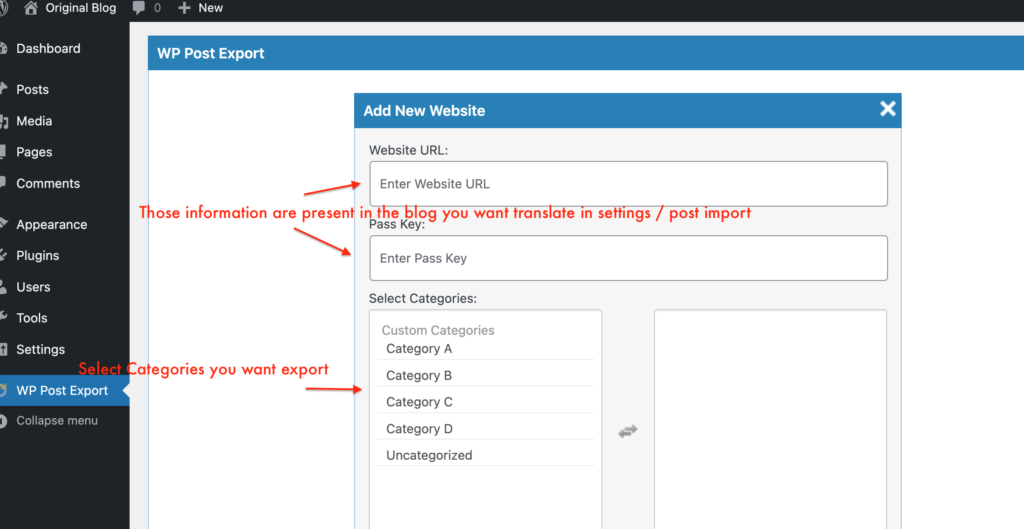
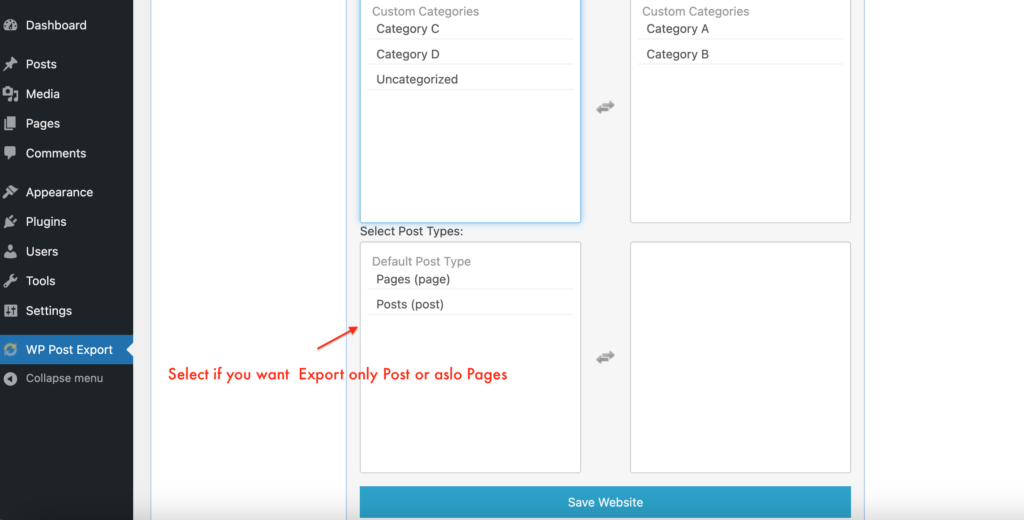
Step 4 : Connect Websites
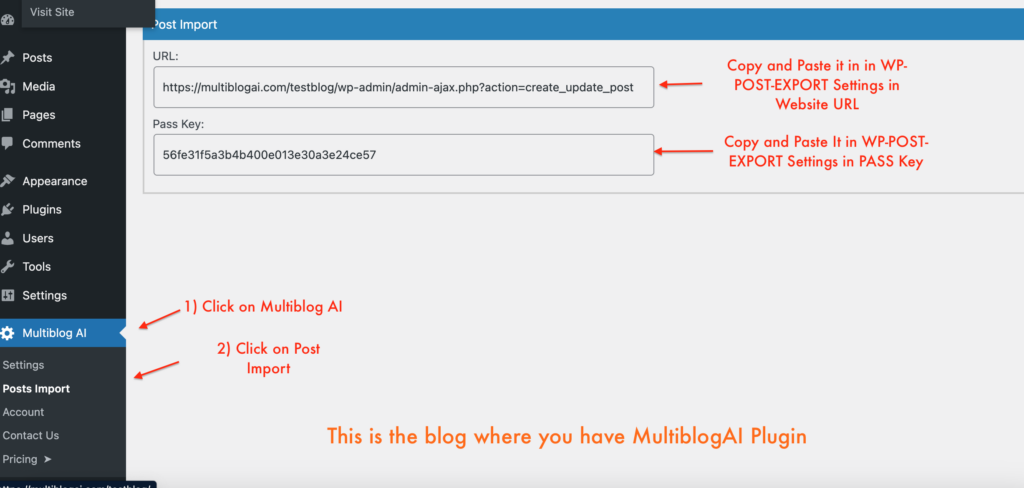
- Recover Import Information
- Go to the blog where you installed the Multiblog AI plugin, in the plugin menu select post import
- Copy the URL information and Pass Key
- Go back to your original blog where you installed WP-POST-EXPORT, in the ”Add new website” menu and paste the information you copied earlier
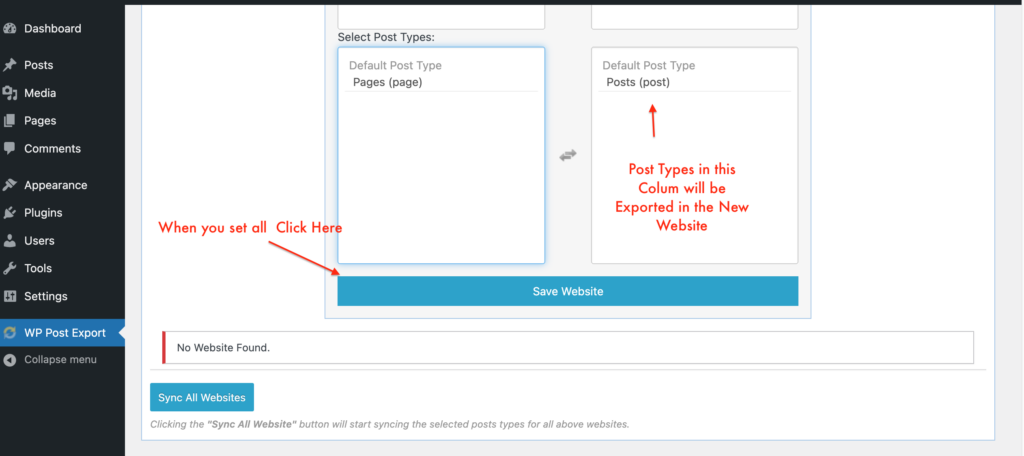
- Complete the WP-POST-EXPORT setup, remember that the categories and the type of pages you want the new blog must be in the right column. After pasting the URL and PASS KEY and completing the settings click on Save
NOW RETURN ON THE BLOG WHERE WP-POST-EXPORT PLUGIN IS ACTIVATED
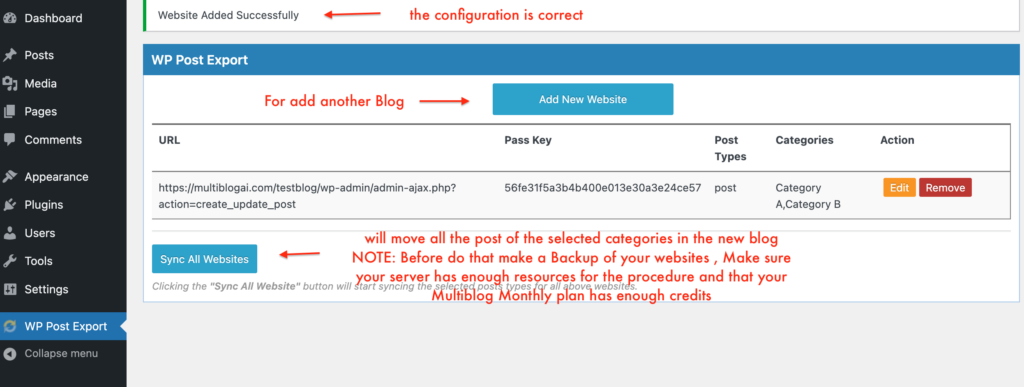
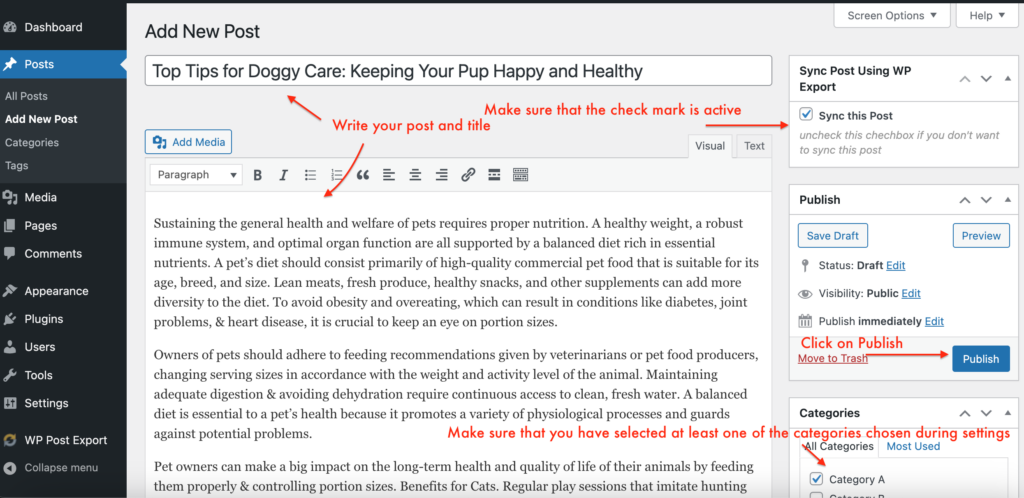
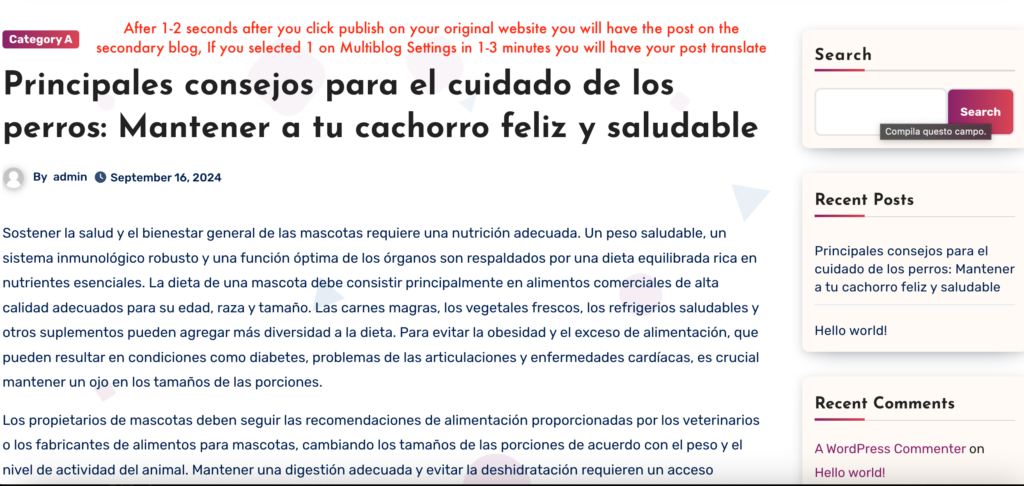
Now the configuration is complete! Let’s see the plugin at work
